We’ve touched on some of the benefits of quality photographs before, but it bears repeating: a picture is worth a thousand words. Well-written descriptions of your dental practice and services are important in your marketing efforts, but photos—like your branding design—help develop your practice’s visual image. Your visual impressions on potential patients can be powerful—for better or for worse!
Contact Us for BrandingGreat Photos Are Inviting
Decent photos show people what your dental office looks like; great photos invite them in. Modern marketing is a very visual field. Quality photography helps people feel familiar with you, your staff, and your practice before they’ve even called to schedule their first appointment. Potential dental patients will feel an added nudge to schedule if they’re drawn in by your practice photos.
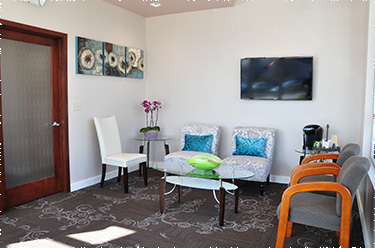
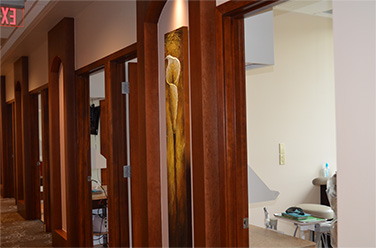
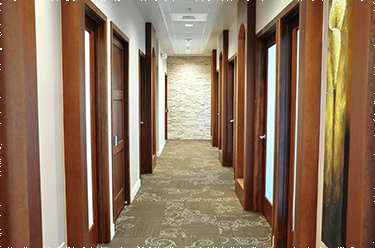
For many people, office atmosphere is becoming more influential in their choice of a dental provider. Patients hope for a comfortable office with a welcoming, polished feel and an all-around pleasant experience. High-quality photos convey that image, especially well-staged pictures that capture your attention to details. We often say, “The difference is in the details!” People like to see stylish, cozy decor. They appreciate thoughtful amenities, including beverage stations, children’s play areas, and TVs in treatment rooms. Pleasant lighting might not seem like a big deal to a dental professional, but taking measures to limit the stark clinical lighting and feel of dental offices of the past can make a significant difference, particularly for anxious patients. If you utilize inviting photos that tell part of your practice’s story, you’ll take your marketing to the next level! You’ll show people the dental experience you provide, not just tell them about the dental treatments that you offer.
If you feel like your office isn’t camera-ready, check out this list of ideas for sprucing up your dental office on a budget.
Office Makeover IdeasTips for Photographing Your Dental Office
Cleanliness & Staging
Schedule your practice photo shoot to happen shortly after your regular janitorial service so the office is as clean as possible. Make sure the space is decluttered, as well. (It’s usually a good idea to put away vendor advertisements.) Also, if your practice doesn’t already have some, add special touches here and there, such as potted plants or fresh flowers, an accent piece or a bowl of breath mints, or a stack of nice coffee table books.
Consider the Weather
Especially if your dental office is in an area where it’s winter for several months of the year, plan to have photos taken during spring, summer, or fall. If your start-up will open in the winter, still have photos taken but plan to have at least the exterior shots retaken when the weather is better. Think about any seasonal or holiday decor in your office, too. You don’t want Valentine’s hearts, leprechauns, or jack-o-lanterns appearing in your dental marketing photos that you want to be able to use year-round.
Block Out the Time
Schedule your dental photo shoot during a time when you and your staff won’t be taking care of patients. If you have a regular “business day” when you don’t schedule patients, that can be ideal because at least some of your staff will likely already be planning to work that day (if you want staff appearing in your photos). If your office hours don’t include that kind of day, you could arrange with your team to come in on a Saturday morning. Another option is to reserve a morning or early evening block during your regular hours for a photo shoot and just don’t schedule patients for that time. Early morning light and twilight are typically best for photos outside, which applies to exterior office shots as well as staff photos taken outside.
Prepare a Shot List

Some photographers might require a desired shot list to bid a job. Even if they don’t, providing them with a list will help ensure that you get what you need and want for your marketing. If you’re taking the photos yourself, a shot list will serve as a checklist to help you not forget anything. Contact us for a basic recommended list of shots to have taken during a dental practice photo shoot!
DOWNLOAD A PHOTO CHECKLISTTip: Skip the Loo
 As a general rule, there’s no need to show photos of the bathroom. People will assume you have one, and they’ll expect it to be kept clean. (As a side note, patients appreciate when there are disposable toothbrushes and sample toothpaste tubes in the restroom in case they don’t have the opportunity to brush before coming to your office.) If there’s something totally awesome about your bathroom that you really want to feature in your marketing photos, leave the porcelain throne out of the viewfinder. Also, make sure the bathroom looks equipped with hand soap, maybe a nice lotion bottle, and some attractive artwork or other piece of interest on the wall. Watch out for mirror reflections!
Keep Your Options Open

Make a note on your checklist that you’d like any shot for which it’s possible to be taken both horizontally and vertically. That way, you’ll have options for different print marketing layouts and various displays online. Another solution is to shoot photos wide enough that you have cropping flexibility afterwards, meaning shoot wide enough that both vertical and horizontal crops are possibilities.
Smiling People
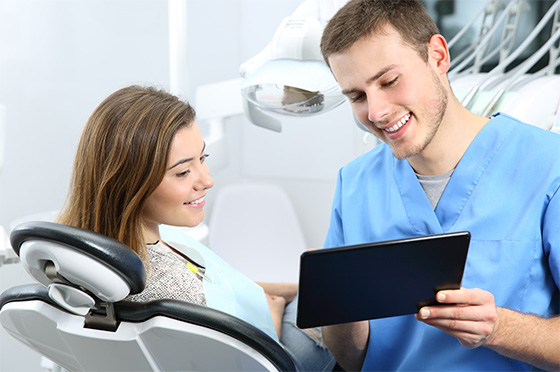
Many dental practice photos can be greatly improved by adding smiling people to the composition! Some operatories are impressive by themselves, whether because of the technology, artwork, or fabulous view out of the window. Other ops, however, come across much better with a smiling patient in the chair and a smiling team member handing them a blanket. See what looks more natural: people interacting and looking at each other, or people looking and smiling at the camera. If your practice is a start-up without established patient relationships, have family members or friends pose as patients. To keep your future options open when it comes to your photos, take variations of certain shots both with and without people. Be considerate of friends who will help you by communicating the anticipated shoot schedule in enough time for them to plan their arrival and departure times accordingly. Additionally, consider sending them a small gift card afterwards as a token of your appreciation for their valuable time.
Tip: Lighting
 Some shots will look warmer and better with the lights on, but other shots might end up with unwanted glares if the lights are on. As your dental practice photos are being taken, you can experiment with the lights on versus off. Take advantage of that wonderful feature of digital cameras to show you a preview image
immediately after a picture is taken! For staff photos, watch out for glares on eyeglasses and shadows on the walls.
Some shots will look warmer and better with the lights on, but other shots might end up with unwanted glares if the lights are on. As your dental practice photos are being taken, you can experiment with the lights on versus off. Take advantage of that wonderful feature of digital cameras to show you a preview image
immediately after a picture is taken! For staff photos, watch out for glares on eyeglasses and shadows on the walls.
Respect Privacy
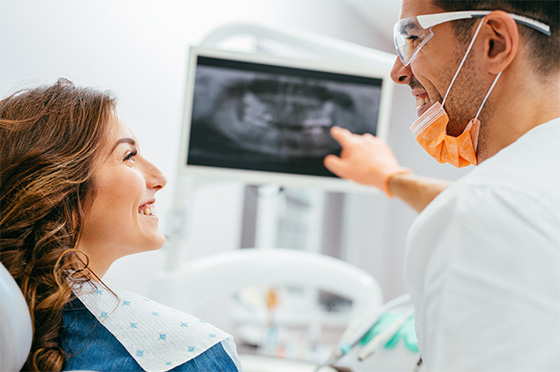
In any operatory or other technology picture (including consultation shots) where a computer monitor or other device might be shown with patient x-rays, make sure that no patient-specific information is visible, even on a zoom of the image. Speaking of monitors, you might want to try shots of your lobby and ops both with and without the TV(s) on. When a TV is on, try to get to a channel that appears as generic as possible.
Contact UsHiring a Great Photographer
If you hire a professional photographer, ask family and friends for any recommendations that they may have based on past experiences. If you’re wary of the first quote you receive, have three different professionals bid the job. Then, depending on your budget, you can typically go with the middle bid (not the most expensive but not the cheapest either). Review listings such as Google My Business, Yelp, and Angie’s List can be helpful resources for finding photographer options. If budget is your main concern but you don’t feel comfortable taking the photos yourself, check out your local university’s or community college’s photography department. Student photographers are often surprisingly qualified, flexible with their hours, and looking for extra work opportunities to build their resumes (and bank accounts).
Before hiring a photographer, discuss shoot details as well as licensing for the final photos. How long of a photo shoot does their price include, and how many final, edited photos will you get? Ask to see examples of their work (most photographers will have portfolio websites). How will image files be delivered to you? Will you own the copyright to the photos, and will you be allowed to crop and use them in your dental marketing as you please? Is there a rescheduling fee in case the weather on the day of the scheduled shoot doesn’t cooperate?
Hire our photographerDental Practice Photo Examples
It doesn’t take a substantial amount of time to make a substantially noticeable difference in your dental practice photos. Take a look at the following examples of how you can improve on some everyday office photos…
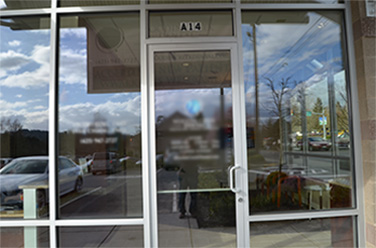
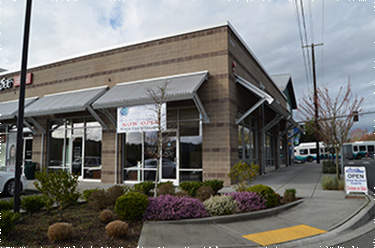
For exterior photos, show people some context (more than your front door) so they know what to look for when driving up to your building.
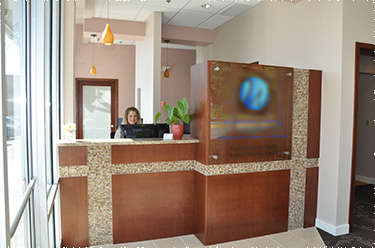
Because patients will check in at the front desk, show it to them, preferably with a smiling person behind it!
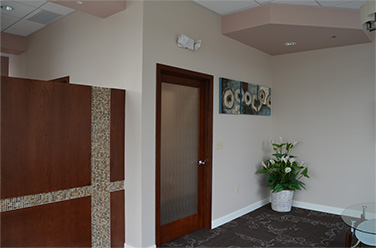
It doesn’t take a lot of accessorizing to take your lobby from “meh” to much more marvelous.
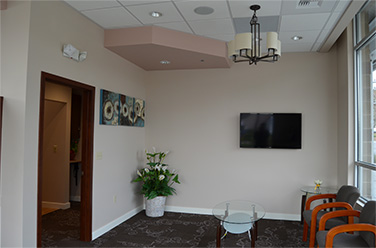
Sometimes a different angle of the same area of your office can make a world of difference in how impressive (or unimpressive) it looks.
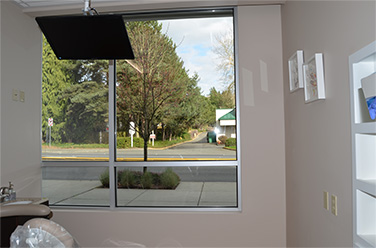
A nice view out of an operatory window is worth mentioning and/or showing in marketing, but make sure the angle also shows enough of the op that it’s obvious what it is.

Sending Us Image Files
If you need to send only a few photos, email should be sufficient. Depending on your image file sizes, you might need to send multiple emails (because many email providers have attachment size limits). If your email provider or software has compression options for sending images, don’t select to permanently compress your photos because that will make their file sizing smaller and, therefore, their quality lower. For bigger batches of photos, consider sharing via Google Drive or another file sharing service such as Dropbox.
Most commonly, we receive JPEGs with files extension .jpeg or .jpg. In general, we’re looking for image files larger than 300K to have high enough resolution for different marketing media, specifically for print. (For the web, our designers will downsize image files for faster loading online.) When measuring the resolution of an image, we refer to the number of dots per square inch, or dpi. For photographs to remain crisp and appealing when they’re printed, a good rule of thumb is to require 300 dpi. (For web, it’s 72 dpi.)
If you’re using your own digital camera and don’t feel “expert” with it, check your manual for resolution settings. If you feel confident in your ability to capture photos with your desired composition but aren’t as confident in your editing capabilities, shoot your photos in raw and ask your dental marketing company to help with the editing. At Practice Cafe, we’re happy to edit photos that will be used in our clients’ marketing projects!
Edit my photosMaximize Your Dental Marketing with Photos
We know it can be challenging for dentists who are busy managing many aspects of their business to get all the various items to us for their dental practice website or mailer, including design input, photos, and biography information, among other things. Some clients start to feel weary with the process and are tempted to rush to the finish line, either with inadequate practice photos (beware of the blurry cell phone photos!) or none at all. Opening postcards can get by with minimal office photos, but larger mailers and websites need good dental practice photos!
Marketing is a financial investment and at Practice Cafe, we want to protect and maximize your investment! We strive to give all dental marketing projects their highest chances for success. For most marketing endeavors, that means having quality photos. Contact us if you need affordable practice photos taken or a virtual tour created!
get a google tour


I agree that great photos can be a big help in a dental office. However, this is something that you usually don’t associate with dentistry. I remember my dentist growing up had pictures on the wall of all the staff that worked there. It seemed to be a great way to help people to feel appreciated as well as a good decorating idea. Thank you for describing the other ways that photography can help, I will keep your tips in mind!